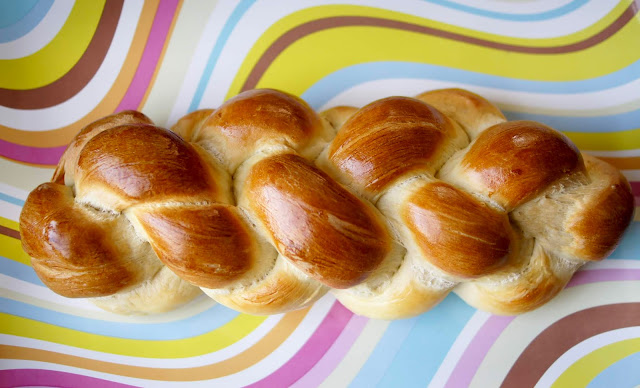
Luisa Weiss recommends fresh yeast for the Schweizer Zopf (Swiss Braid) recipe in Classic German Baking, so it was a good furlough baking project while I tried to use up a pound of fresh yeast. The recipe yields two unsweetened loaves that Weiss says are quite versatile -- a slice pairs equally well with savory ham as it does with Nutella. The recipe headnote states that the dough is very firm and must be kneaded by hand for at least 15 minutes. I normally try to avoid kneading by hand if at all possible (instead I use my Kitchenaid fitted with the dough hook), but I was willing to give the recipe a try.
To make the dough, you first crumble the yeast into a small bowl, add a pinch of sugar and some warm milk, whisk to dissolve, and let it sit for a few minutes. You place all-purpose flour in another bowl, make a well in the middle, and pour in the yeast mixture and begin to stir it in. You slowly pour in more warm milk, melted and cooled high-fat butter, and salt, and continue stirring until the mixture becomes so stiff that it must be kneaded by hand.
I set a timer for 20 minutes and kneaded. And kneaded and kneaded. As my poor luck would have it, I made this loaf of bread the day after we received some substantial snow. I had shoveled a fair amount of snow in the morning before tackling this bread project in the afternoon and my arms and back were already sore. Kneading this dough for such a long period of time was exhausting and painful, but I somehow made it to the end. After I was done, I let the dough rise until doubled.
The method for braiding this bread is one that I have never used before and it was difficult for me to visualize, so I needed to consult some YouTube videos before attempting it. Each loaf is formed from two braided strips of dough; since the recipe yields two loaves, I divided the dough into four equal portions. I rolled out each portion into a long skinny rope about 30-inches long. I took two of the ropes and formed them into an "X" by laying one across the other. You take the ends of the rope on the bottom and cross them over the piece on top. Then you do the same with the other piece of dough, and continue the process until you have braided the whole loaf. (Really, look at a YouTube video, since I'm not doing a good job describing it.) You get what is the equivalent of a four-strand braided bread, but it only requires two strands of dough that are twice as long as the four separate strands you would normally use. I actually prefer this method to a four-strand braid because you only have to pinch the strands together on one end of the loaf; the other end is seamless.
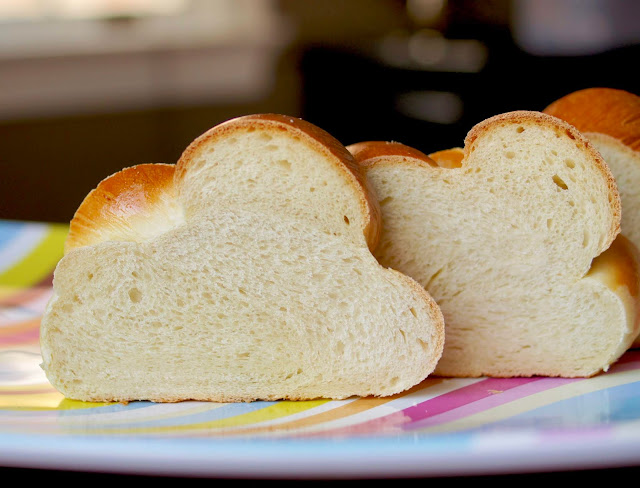
You brush the loaf with thinned egg yolk before baking and the bread developed a shiny, golden crust in the oven. I thought that these loaves looked fantastic. The recipe says that the loaves will be larger at one end than the other, but my loaves were fairly symmetrical. They sliced beautifully and had a compact crumb. As you can see in the photo below, you could make out the distinct grain in the separate strands of dough that were braided together. Weiss mentions this feature in the headnote, observing that "you can actually see the braided strands in the tight, sturdy crumb, like ocean currents."
This bread was wonderful. I was surprised how flavorful it was. It's basically just yeast, milk, flour, butter, and salt. But it had a well-developed flavor that I'm going to attribute to the yeast since I can't identify it as anything else in particular. It was soft and delicious when freshly baked, and I since I got two huge loaves from the recipe, I sliced the loaves and stored most of the bread in the freezer. The frozen slices toasted up beautifully and we have enjoyed them as breakfast toast or as a dinner side. I recently pulled a bag of this bread out of the freezer and gave it to my friend Dorothy to serve along with a dinner of pasta and metaballs, and she said it was a great accompaniment.
The extended kneading time required to make this bread requires some serious commitment. But it's totally worth it!
Recipe: "Schweizer Zopf (Swiss Bread)" from Classic German Baking by Luisa Weiss.
Previous Post: "What I Did During Snowzilla, Part IV: Four-Strand Braided Challah," February 21, 2016.


Comments